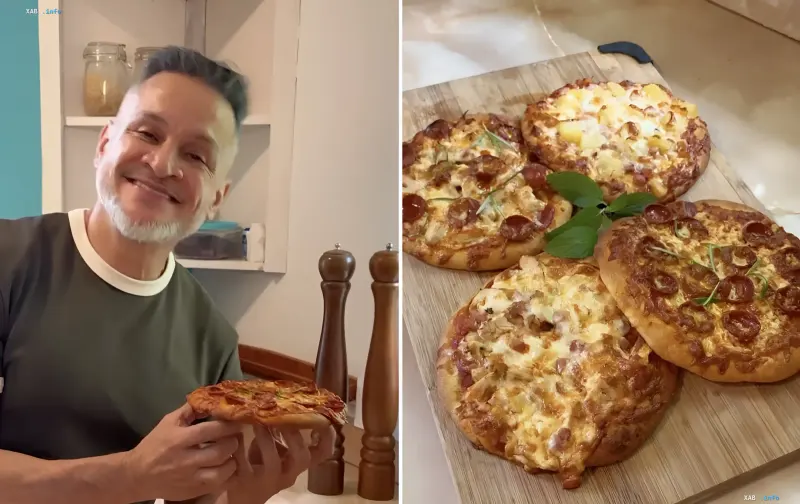
Chef Ector Jimenez-Bravo posted a video on Instagram with a recipe that instantly sparked a wave of nostalgia among Ukrainian viewers: he showed how to make at home the very pizza many remember from school cafeterias and snack bars. This is reported by the Styler entertainment project from RBC-Ukraine. In the video footage and accompanying photos, the master demonstrates four small round pizzas with various toppings — from classic sausage with cheese to a pineapple version — arranged on a wooden board. According to the recipe's author, the main advantage of this dish is the complete absence of strict rules: the toppings can be changed to suit personal preferences while still preserving the recognizable "school" taste.
Dough: the foundation of nostalgic flavor
The process begins with kneading a simple yeast dough. In a deep bowl, you need to mix flour, dry yeast, salt, and sugar, then add an egg, warm milk, and butter. The dough is kneaded until soft and elastic, covered with a towel or plastic wrap, and placed in a warm spot for 40–60 minutes. During this time, it should rise well and noticeably increase in volume. After proofing, the dough is divided into four equal parts, each of which is shaped by hand into a small round base. The edges of the base are brushed with butter, and the center is spread with tomato sauce or regular ketchup — according to Jimenez-Bravo, this latter option brings the result closest to the taste of a school cafeteria.
Toppings and baking: from sausage to pineapple
The prepared dough is topped with fillings. For the most authentic "school" version, the chef recommends boiled sausage, pickled cucumbers, ketchup, and cottage cheese. However, more modern combinations are also acceptable: boiled chicken, ham, tomatoes, pineapple, or any other vegetables to taste. The pizza is then generously sprinkled with grated cheese. The dish is baked in an oven preheated to 220 °C for 15–20 minutes. The sign of readiness is well-browned dough edges and a golden crust on the cheese. In the photos published along with the video, four pizzas with various topping combinations are visible, garnished with fresh basil leaves, which emphasizes the freedom in choosing ingredients.
Storage and reheating: expert tips
Such pizzas are convenient to make in advance and freeze, so that a breakfast or snack can be quickly reheated at any time. According to recommendations from the US Food Safety and Inspection Service (USDA FSIS), cooked pizza can be stored in the freezer for one to two months, and in the refrigerator for three to four days. Before storing, the finished dish should be covered or tightly wrapped. Baking experts at King Arthur Baking offer another method for those who make pizzas in advance: first partially bake the base so that the dough holds its shape but is not yet browned. After cooling, the base is topped with sauce, cottage cheese, and fillings, packed, and frozen. Such a semi-finished product can be cooked straight from the freezer, simply increasing the baking time.
How to restore the crunch: reheating without a microwave
If the pizza was frozen in a fully cooked state, it is first thawed and tightly packed. To restore the pleasant texture, King Arthur Baking does not recommend using a microwave. Instead, a slice of pizza should be placed on a cold pan, covered with a lid, and heated over medium-low heat for 6–10 minutes. Direct contact with the pan makes the bottom crispy again, while the heat under the lid melts the cheese and prevents the toppings from drying out. It is precisely this simplicity and flexibility of the recipe that make it popular: the familiar taste of childhood is recreated in minutes from ingredients found in almost every kitchen.